Lab 6
- Create a "fork" of the "simple-SSG" repo Opens in a new window referenced in the lesson notes.
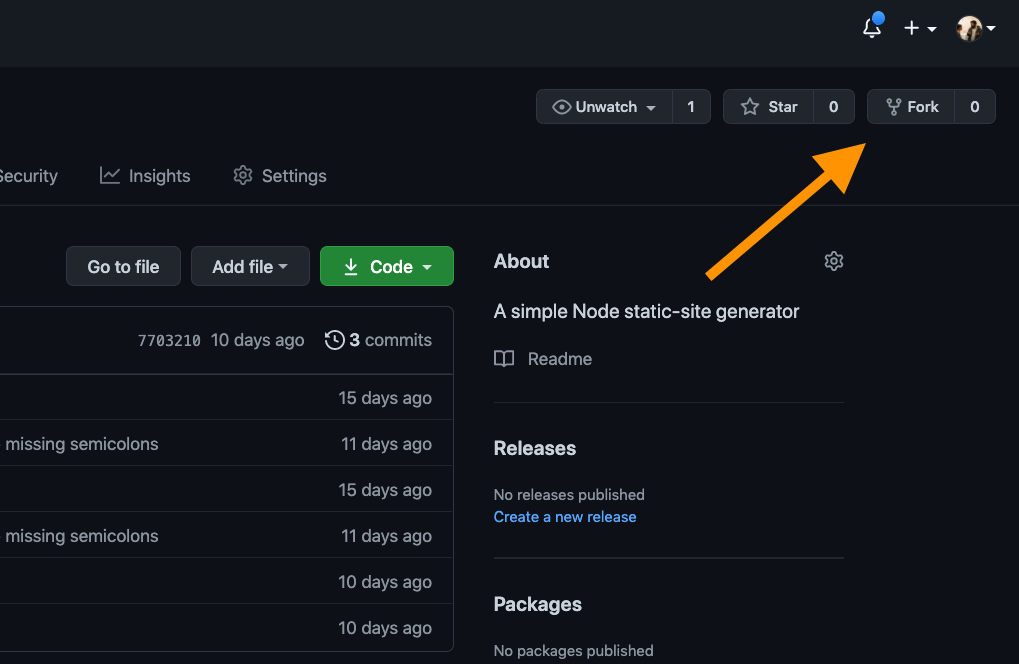
What the heck is "fork"?
Not sure how to "fork" a project? It's easy! Just go to the repo in your browser and click the "fork" button near the top-right of your screen.
Forking a repository allows you to freely experiment with changes without affecting the original project. Most commonly, forks are used to either propose changes to someone else's project or to use someone else's project as a starting point for your own idea. You can fork a repository to create a copy of the repository and make changes without affecting the upstream repository.
Github docs Opens in a new window
- Clone your forked repo to your computer.
I already have that folder, though!
When you try to clone your forked repo, you may have the issue that you already have a folder named "simple-SSG" (because, following along with the lecture, you cloned the original repo). This prevents you from cloning your fork.
You could simply cd into a different directory, but then you've got projects in multiple different places. Not ideal.
Instead, what you can do is add the folder name you'd like to use at the end of your git clone command.
Instead of running this:
git clone git@github.com:simonborer/simple-SSG.git
# fatal: destination path 'simple-SSG' already
# exists and is not an empty directory.
...just run this:
git clone git@github.com:simonborer/simple-SSG.git ssg-fork- Install the project dependencies.
- Create a new "blog post" by adding a new markdown file in the
/content/folder. Make sure to include the "front matter" for your post (the infomation contained between the---characters at the beginning of each markdown file). - Use the
buildandservecommands to preview your work in your browser. - Add and commit the changes you've made to your local repo, then push them to your remote repository.
- Go to Netlify Opens in a new window and create a new site based on your repo:
- Follow the instructions to deploy a repo to Netlify (starting on step 3 of the instructions on that page)
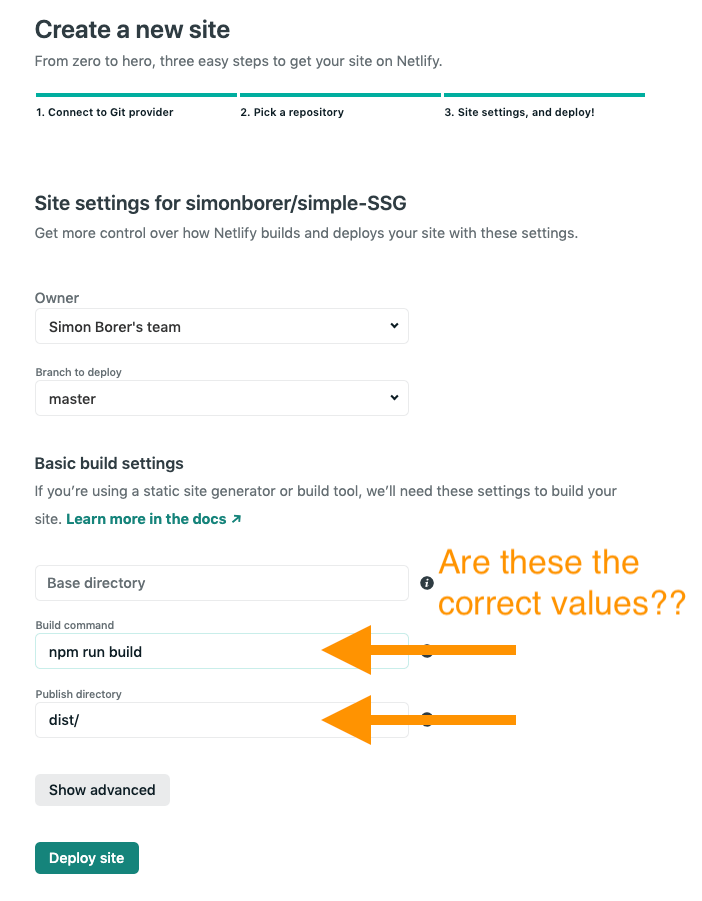
- When you get to the "deploy" step, add values to the "Build Command" and "Publish Directory" fields.
- "Build Command"
- The command you would run in your terminal to build the html pages
- "Publish Directory
- The name of the folder that contains your html pages, a.k.a. the "root" folder for your site.
Oh no, I deployed with the wrong deploy settings!
Not to worry! You can always update these settings. In Netlify, go to your site and go to
Site Settings → Build & Deploy → Build Settings → Edit Settingsand update them there.Just a reminder: If you want to trigger a build without a push to your repo's main branch, you'll need to go to your site on Netlify and go to
Deploys → Trigger Deploy → Deploy Site
Here's what I want you to notice
In our repository, there are no HTML files or node modules (they've been ignored in git).
In our deployment pipeline (Netlify, in this case), we use our package.json file to provide instructions on how to build things, dependencies listed in the dependencies objects, and scripts to execute in the scripts object.
Our pipeline then builds our site for us.
Deliverables for this lab:
In blackboard, submit the live URL of the new page you made and deployed via Netlify.